Small Batch Production of Cuban Link Chains and Inlaying Stones in Wax
The Cuban link chain iced out with gemstones, as a popular jewelry necklace style today, is mainly made by hand and machinery in traditional production, while the development and application of WaxJet 3D printers brings new changes, transferring parts of the traditional processing to a digital way hence higher efficiency in jewelry manufacturing. Let’s learn the application case of the WaxJet 3D printers and how WaxJet 3D printers help a jewelry factory produce Cuban link chains in an efficient way.
Part 1: What's Cuban link chains and inlaid diamonds
Cuban link chains
The Cuban link is a chain made up of circular or oval links, with a smooth bottom that can lie flat on the wrist, neck, chest, and other areas.
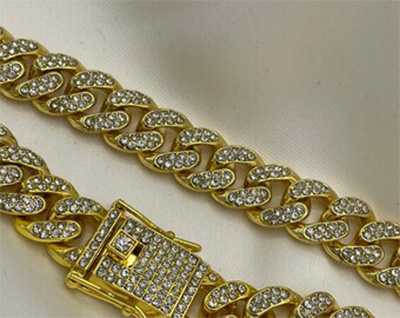
The most accepted history of the Cuban link traces back to the rise of HIP-HOP music in the 1970s. At that time, a rapper named Felix Delgado popularized this kind of chain, so it was named after his stage name, Cuban Link. You know that the Cuban link was not invented by the country of Cuba; it first became popular in Miami, a hotspot for rap culture, and is also known as the Miami Cuban Link Chain. Behind its popularity is the profound influence of Black HIP-HOP culture, giving it a cultural significance distinct from ordinary necklaces. In recent years, with the globalization of HIP-HOP music and culture and the fusion of street culture with fashion, many high-end fashion houses have designed different styles of Cuban link jewelry, reigniting its popularity. Advanced jewelry manufacturing equipment and techniques, along with a variety of gemstone/diamond materials, have evolved it into various forms, such as Iced Out Diamond Cuban Link Chain and Pig Nose Cuban Link Chains. Anyway, the basic core of how Cuban links are strung together remained. It’s always central to the design (the sturdiest way to connect rings in many jewelry designs).
Inlay gemstones to wax jewelry models
The gemstones inlaid in wax technique originated in the 1980s and has matured over nearly 40 years. Unlike traditional gold inlaying methods, the inlay-in-wax technique involves pre-setting gemstones onto a wax pattern, assembling the wax patterns to create a tree-like structure, making plaster molds, and dewaxing. And the gemstones remain within the casting mold. The final jewelry piece with set gemstones is obtained after pouring and casting, followed by minor post-processing.
Compared to traditional gold setting, the setting-in-wax technique offers several unique advantages. Firstly, the flexibility of the wax pattern makes it easier and quicker to secure gemstones during the setting process. For instance, setting a jewelry piece with 40 small round diamonds takes about 2 hours by a skilled stone setter using traditional gold setting, while with setting-in-wax, the process takes approximately 10 minutes. Additionally, due to pre-designed gemstone holders and prongs, there's minimal need for post-processing, saving time and reducing precious metal wastage. Secondly, during casting, metal solidification shrinkage enhances the gemstone's secure setting, minimizing the risk of falling off and improving product quality.
The basic process of the setting-in-wax technique involves creating wax patterns, setting gemstones, wax tree assembly, plaster mold creation, dewaxing, pouring, obtaining the casting, and polishing. The challenging part lies in making wax patterns, which demands precise control over dimensions. In micro-setting, where gemstone spacing is 0.05mm, a mold forming spacing of 0.04mm would result in a 20% deviation. During casting, the heat-induced expansion of gemstones and the metal solidification shrinkage can lead to mutual pressure among the gemstones, potentially resulting in breakage or detachment. With the advancement of 3D printing, using wax printing for mold production has become an essential trend in jewelry making. This method enables rapid and accurate mold creation, ensuring consistent and stable product quality.
Part 2: Traditional Production Process of Cuban Link Chains
The traditional production process of Cuban link chains involves several key steps. First, metal raw materials are shaped into metal wires using a rolling mill or manual stretching. These metal wires are then coiled around a wire bar to form spring-like metal rings, ensuring uniformity and tightness. A wire saw or other tools are then used to cut straight through the coil in order to separate the individual metal links. The round links are then connected one by one to create a metal chain, which is soldered at the joints. After soldering, one end of the metal chain is fixed, while the other end is rotated to twist the round links into the preliminary shapes of Cuban links. The chain is then removed, flattened and smoothed with a file, and clasps are soldered onto both ends (clasps customizable). Finally, the entire chain is polished to obtain a Cuban link chain.
For creating stone-inlaid Cuban link chains, it can be realized by gemstone inlaid on the finished Cuban link chains.
In this traditional manufacturing process, three critical steps require either mechanical equipment or manual operation: controlling the diameter of metal wires and the diameter of each metal link, ensuring that the soldered round link is pulled straight and tight before twisting to form the Cuban link chain's preliminary shape, and carefully managing the chain's tension during twisting to prevent breakage.
Part 3: WaxJet 3D Printer Application in Small-Batch Production of Cuban Link Chains
Step 1: Lay out Stone-inlaid Cuban Link Chain Models

The jewelry factory arranges stone-inlaid Cuban link chain models using WaxJetPrint. This enables batch printing of stone-inlaid Cuban link chains in one go, producing seamless models with no joints as they are printed as single, integrated pieces.
Step 2: Print Wax Patterns by WaxJet 3D Printer

Step 3: Remove and Clean Printed Wax Patterns
For the printed Cuban link chain wax patterns, the white part is the support structure. The support structure can be removed easily by immersing the entire wax patterns in the solution. The required wax patterns are obtained as shown in the image above. Subsequently, traditional gemstone setting techniques can be applied.

Step 4: Set Stones in Wax Patterns
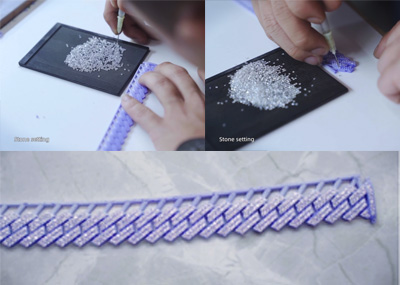
The image above showcases a finished Cuban link chain with stone inlaid. Available gemstones: lab-grown diamonds, natural zircon gemstones, moissanites, natural gemstones, diamonds, etc.
Based on order or design requirements, for small quantities, manually inlaying stone can be performed. During manual setting, the worker holds a specialized stone picker to place gemstones while pressing and securing the wax pattern. The process involves repetitive actions of picking and placing stones, demanding careful attention to stone size and positioning, requiring high concentration. In cases of tight deadlines, automatic stone inlaying machines can be employed. These machines operate several times faster than manual work, boosting productivity and ensuring a higher rate of quality products. However, they demand tougher and harder wax patterns.
Step 5: Investment Casting Process
After setting stone, the subsequent steps include wax tree assembly, investment casting, sprue cutting, polishing, and buffing, as shown in the images below.
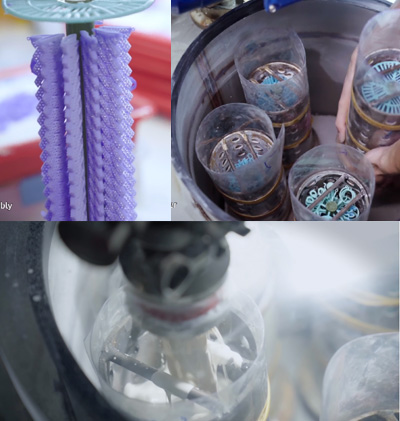
▲Making wax tree - Pouring gypsum for investing

▲Investment casting to get the metal ring
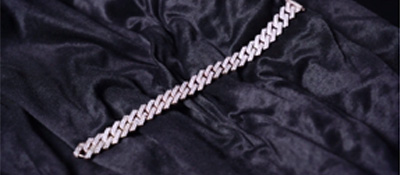
▲Final result
The images above show the finished gemstone-inlaid Cuban link chain. By utilizing the capabilities of 3D printing technology and WaxJet 3D printer, wax jewelry models can be produced in one go, eliminating multiple traditional steps in mass production, thus boosting efficiency. Furthermore, the design of the finished product allows for diversified and personalized clasp designs, catering to various fashion styles desired by jewelry customers.

